
You'll also need
- Internet access to resize and crop your photos to fit the molds, using our online photo cropper
- Inkjet printer
- Sharp scissors
- Paper towels
Please save, share, and follow us:
YouTube Channel Pinterest Facebook Instagram
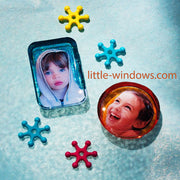
This project can be done in 1 or 2 layers. Either way, start by shrinking and cropping your photos using our online app at little-windows.com. This will work with any computer or mobile device. Then print your photos onto the Special Photo Paper for Resin, following the instructions for best print quality.
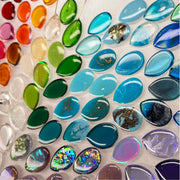
Use the template that comes with your mold set to trace and cut out your Resin Color Film, and your photo. Then cut your photo into a silhouette so the color film shows as the background.
Mix and pour Brilliant Resin, following label instructions, slide in your cut Resin Color Film shape and gently push it to the bottom of the mold using the mixing wand that comes with your resin.
Single Layer Approach: Slide in your photo silhouette and press that down against the Resin Color Film, to push out any air trapped between the two. Cover and let rest for 10 miutes, then check for bubbles. Scoop them with your mixing wand, or pass a heat gun on low over the surface. Do NOT use a flame or torch on your molds. It will bond the resin to your mold.
Double Layer Approach: This method creates more dimension, and a smooth rounded finish on the top of your casting. Let the first layer of resin with the Resin Color Film set up for at least 12 hours. Remove casting from mold, if the top edge is irregular, trim it level with sharp scissors. Place it on a Doming Tray or on a sheet of wax paper, and put 1 scoop of resin into the concave top. Spread this around, then press your photo silhouette into the liquid. Press it down across the photo so any air pockets can squish out. Wait 20 minutes for your resin to thicken a bit, then pour more resin over your photo, creating a nice level dome, but not too much or it may overflow. Push photo down again if necessary. Cover and let rest for 10 miutes, then check for bubbles. Carefully scoop them with your mixing wand, or pass a heat gun on low over the surface - using a flame or torch can bond the resin to your mold.
These can become pendants, magnets, keychains, ornaments, all kinds of keepsakes!
- All Effects
- 3-D
- Bendy Resin
- Bezels
- Casting
- Thin Coat/Varnishing
- Dichroic/Color Shift
- Doming
- Doming-Up
- Double-sided Doming
- Flowers in Resin
- Embedding Elements
- Feathering/Swishing
- Glow In The Dark
- Ink Effects
- Layering
- Making Multiples
- Marble Effect
- Ocean Looks
- Personalizing
- Petri
- Punch Projects
- Resin On Fabrics
- Resizing Images
- Ripple Effect
- Special Effects
- Stamping
- Stone Effects
- Surface Finishes
- Twisted Resin
- Wire Work
- All Types
- 3-D Projects
- Bookmarks
- Bracelets
- Buttons
- Cabochons (half-spheres)
- Candle Votives
- Charms
- Coaster
- Cosplay/Costumes
- Decor
- Dishes/Containers
- Earrings
- Fandom
- Frames
- Games
- Hair Accessories
- Heart Shaped Projects
- ID Tags/Markers
- Keychain
- Knob/Pulls
- Magnets
- Memorabilia
- Necklaces
- Ornaments
- Paperweight
- Patriotic
- Philatelic (stamps)
- Photo Keepsakes
- Pins
- Prayer Beads
- Resin Eyes
- Rings
- Sun Catchers
- Zipper Pulls
- All Events
- All Special Events
- All Holiday
- Pets
- Ancestry/Family
- Wedding
- Anniversary
- New Baby
- Faith
- In Memory of
- Solidarity/Awareness
- Game Day
- New Year
- Valentines
- Easter
- Mother's Day
- Graduation
- 4th of July
- School Days
- Halloween
- Christmas
- More Special Occasions
- All Materials
- All Resin Colorants
- All Organic Matter
- Alcohol Ink
- Acrylic Paint
- Ashes
- Beads
- Black and White Looks
- Candy
- Clear Photo Film
- Color-Shift
- Crystals
- Dichro-ISH Films
- Dried Flowers
- Fabric/Fiber
- Glitter
- Glow In The Dark
- Hair
- Liquid Colorants
- Nail Polish
- MakeUp
- Metal
- Mica Powder
- Mixed Media
- Papers
- Photos
- Plastics
- Polymer Clay
- Postage Stamps
- Resin Color Film
- Sand / Stones
- Sequins
- Shells
- Shrink Films
- Stickers
- Washi Tape
- Wire
- Wood

